How to Create an School/College Website using HTML CSS

| Youtube : | https://youtu.be/hyBtQfvCzHI |
| Views : | 71516 |
| Skills : | Pure HTML And CSS |
| Category : | Web Design |
| Tag : | school,university,college |
In This Tutorial We Are Learning How To Make College Website With The Use Of HTML And CSS. In this website we are not going to use javascript or jquery. This website is going to be pure HTML and CSS.
Section We Are Going To Design In Our School Website
In our website, we are going to design three main section : Header section, Main Body And Footer section
In this tutorial we are going to design these three section with the help of their subsections. Subsections are created as per the website content.
Header Section
- Top header
- Marquee
- Logo
- Main menu
Main Body Section
- Slider section
- Latest new, upcoming events and notice board
- Useful information
- Gallery
Footer Section
- Quick link
- Contact information
- Social media link
- Copyright information
Video Tutorial
To see full coding video to understand easily. You can watch the video tutorial below.
Let's Start The Coding
Firstly, Create the folder on dekstop, my folder name is : my college Inside folder my college folder, create two sub folder : - 1) css and 2) images
Inside my college folder, I am creating HTML file file name - index.html
Inside my college folder, I am creating CSS file - file name - style.css
Lest's start with writing basic HTML 5 code in index.html, and link the style.css file to index.html file
Meta html code. Copy And paste the code in index.html
index.html
<!---------- Meta HTML Starts --------->
<>
<>
<>
<>my college website Template<>
<>
<>
<>
<>
<!---------- Meta HTML Ends --------->
Common CSS. Copy and paste the code in style.css
style.css
/********** Common CSS Starts **********/
* {
     margin:0px;
     padding:0px;
}
 body, html {
     font-family Roboto, sans-serif, arial;
     background:#f0f3fa;
}
 .width-100 {
     width:100%;
     float:left;
}
 .width-20 {
     width:20%;
     float:left;
}
 .width-25 {
     width:25%;
     float:left;
}
 .width-30 {
     width:30%;
     float:left;
}
 .width-33 {
     width:33%;
     float:left;
}
 .width-40 {
     width:40%;
     float:left;
}
 .width-50 {
     width:50%;
     float:left;
}
 .width-60 {
     width:60%;
     float:left;
}
 .width-70 {
     width:70%;
     float:left;
}
 .width-80 {
     width:80%;
     float:left;
}
 .width-90 {
     width:90%;
     float:left;
}
 .width-10 {
     width:10%;
     float:left;
}
 .container {
     width:1500px;
     margin:0 auto;
}
 .plr {
     padding-left:100px;
     padding-right:100px;
}
 .margin-top-50 {
     margin-top:50px;
}
/********** Common CSS Ends **********/
2) Now, we will design Top Header section.
In our top header section, we are having moving news section, which is moving from right to left. For Creating moving news section we are going to using marquee.
Please copy and paste the below code to design Top header section
Top Header section HTML code. Copy this code and paste in index.html file
index.html
<!---------- Top Header Starts --------->
<>
<>
<>
<> NEWS : <>
<>
My college: Intelligence plus curiosity-that is the root of true education.
<>
<>
<>
<>
<!---------- Top Header Ends --------->
Top Header section CSS code. Copy the code and paste in style.css
style.css
/********** Top Header Starts **********/
.top-header {
     background:#2196f3;
     padding:5px 0px;
     border-bottom: 1px solid #3131315e;
}
 .news-list {
     background: #fff;
     color: red;
     padding: 6px;
     font-size: 20px;
}
 .headquote {
     font-size:18px;
     color:#ffffff;
     width:80%;
}
/********** Top Header Ends **********/
Output Of Top Header Section

3) Now, we will design Logo And Main Menu section.
In our logo and main menu section, we are having logo and nav bar. For Creating logo we have img tag and for nav bar we are using ul tag.
Please copy and paste the below code to design Logo and Main Menu section
Logo And Main Menu section HTML code. Copy this code and paste in index.html file
index.html
<!---------- Logo And Main Menu HTML Starts --------->
<>
<>
<> <> <>
<>
<><>Home<><>
<><>About us<><>
<><>Academics<><>
<><>Admission<><>
<><>Gallery<><>
<><>Notice Board<><>
<><>Contact Us<><>
<>
<>
<>
<!---------- Logo And Main Menu HTML Ends --------->
Logo And Menu section CSS code. Copy the code and paste in style.css
style.css
/********** Logo And Menu Starts **********/
.header-menu {
     position: relative;
     box-shadow: 0px 2px 5px 0px #00000036;
}
 .logo {
     width: fit-content;
     float: left;
}
 .main-menu {
     list-style:none;
     float:right;
     margin-top: 20px;
}
 .main-menu a {
     font-weight: 500;
     color: #3a3a3a;
     font-size: 20px;
     text-decoration: none;
}
 .main-menu li {
     float:left;
     padding:12px 15px;
}
/********** Logo And Menu Ends **********/
Output of Logo And Menu Section

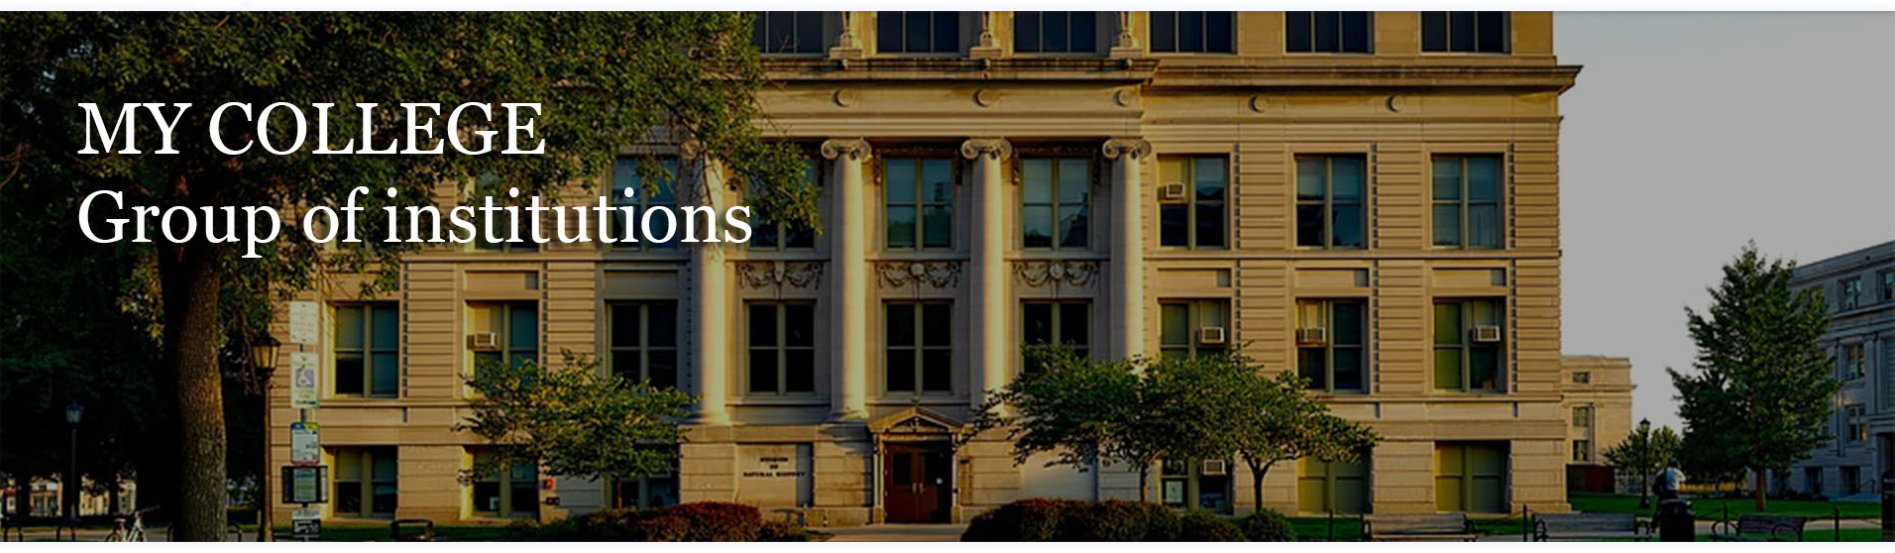
4) Now, we will design Slider section.
In our slider section, we are having image and it covers the whole width. For Creating slider we have img tag and giving it width 100% so that it covers full width.
Please copy and paste the below code to design Slider section
Slider section HTML code. Copy this code and paste in index.html file
index.html
<!---------- Slider HTML Starts --------->
<>
<>
<>
<!---------- Slider HTML Ends --------->
Slider section CSS code. Copy the code and paste in style.css
style.css
/********** Slider Starts **********/
.slider-width{
     width:100%;
     height: auto;
}
/********** Slider Ends **********/
Output Of Slider Section
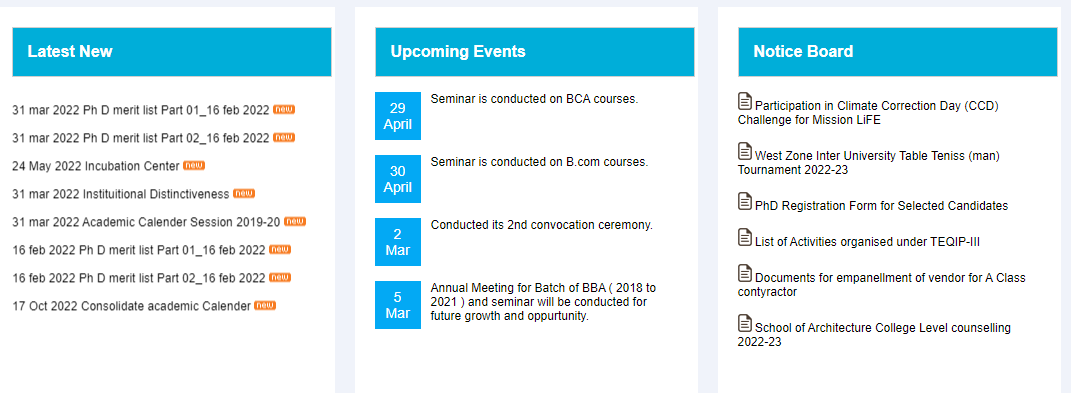
5) Now, we will design Latest News, Event And Notice Board section.
Now we are going to create second section after slider. In this section we have Latest News, Event And Notice Board Section.
Latest News is moving from bottom to top. For this we are going to use marquee
Please copy and paste the below code to design Latest News, Event And Notice Board section
Latest News, Event And Notice Board Section Code. Copy this code and paste in index.html file
index.html
<>
<>
<>
<>
<>
<>Latest New<>
<>
<>
<>
<> 31 mar 2022 Ph D merit list Part 01_16 feb 2022 <><>
<> 31 mar 2022 Ph D merit list Part 02_16 feb 2022 <> <>
<> 24 May 2022 Incubation Center <><>
<> 31 mar 2022 Instituitional Distinctiveness <><>
<> 31 mar 2022 Academic Calender Session 2019-20 <><>
<> 16 feb 2022 Ph D merit list Part 01_16 feb 2022 <><>
<> 16 feb 2022 Ph D merit list Part 02_16 feb 2022 <><>
<> 17 Oct 2022 Consolidate academic Calender <><>
<>
<>
<>
<>
<>
<>
<>
<>Upcoming Events<>
<>
<>
<><>29 <>
April<><> Seminar is conducted on BCA courses.<> <>
<><>30 <>
April<><> Seminar is conducted on B.com courses.<> <>
<><>2 <>
Mar<><> Conducted its 2nd convocation ceremony.<> <>
<><>5 <>
Mar<><> Annual Meeting for Batch of BBA ( 2018 to 2021 ) and seminar will be conducted for future growth and oppurtunity.<> <>
<>
<>
<>
<>
<>
<>
<>Notice Board<>
<>
<>
<><> Participation in Climate Correction Day (CCD) Challenge for Mission LiFE <>
<><> West Zone Inter University Table Teniss (man) Tournament 2022-23 <>
<><> PhD Registration Form for Selected Candidates <>
<><> List of Activities organised under TEQIP-III <>
<><> Documents for empanellment of vendor for A Class contyractor <>
<><> School of Architecture College Level counselling 2022-23 <>
<>
<>
<>
<>
<>
Latest News, Event, Notice Board section CSS code. Copy the code and paste in style.css
style.css
/********** Latest News, Event, Notice Board Starts **********/
.latest-news{
     margin-left:10px;
     margin-right:10px;
     background:#fff;
     padding:20px;
     height:350px;
     margin-bottom:30px;
}
 .event-list{
     margin-left:10px;
     margin-right:10px;
     background:#fff;
     padding:20px;
     height:350px;
     margin-bottom:30px;
}
 .notice-board{
     margin-left:10px;
     margin-right:10px;
     background:#fff;
     padding:20px;
     height:350px;
     margin-bottom:30px;
}
 .our-principal{
     margin-left:10px;
     margin-right:10px;
     background:#fff;
     padding:20px;
     height:350px;
     margin-bottom:30px;
}
 .about-us{
     margin-left:10px;
     margin-right:10px;
     background:#fff;
     padding:20px;
     height:350px;
     margin-bottom:30px;
}
 .certificate{
     margin-left:10px;
     margin-right:10px;
     background:#fff;
     padding:20px;
     height:350px;
     margin-bottom:30px;
}
 .heading-sect{
     width: 100%;
     float: left;
     border-bottom: 1px solid #cfcfcf;
     padding-bottom: 0px;
     margin: 0px;
     margin-bottom: 15px;
     padding-top: 2px;
     border: 1px solid #cfcfcf;
     padding-bottom: 10px;
     padding-top: 15px;
     padding-left: 15px;
     background: #00aed9;
     color:white;
}
 .heading-sect h3{
     color:white;
}
 .head-title {
     margin: 0px;
     padding: 0px;
     font-size: 16px;
     font-weight: 600;
     font-family 'Roboto', sans-serif!important;
     color: #2196f3;
     padding-bottom: 5px;
}
 .upcoming-event-list li {
     width: 100%;
     float: left;
     margin-bottom: 15px;
}
 .upcoming-event-list{
     padding:0px;
    list-style:none;
}
 .event-date {
     background: #03a9f4;
     width: 30px;
     float: left;
     text-align: center;
     font-size:14px;
     color: #fff;
     padding:8px;
     margin-right: 10px;
}
 .notice-board-list li {
     width: 100%;
     float: left;
     margin-bottom: 15px;
}
 .notice-board-list{
     padding:0px;
     list-style:none;
}
 .latest-news-ul{
     padding:0px;
    list-style:none;
    line-height: 40px;
}
/********** Latest News, Event, Notice Board Ends **********/
Output Of Latest News, Event, Notice Board Section
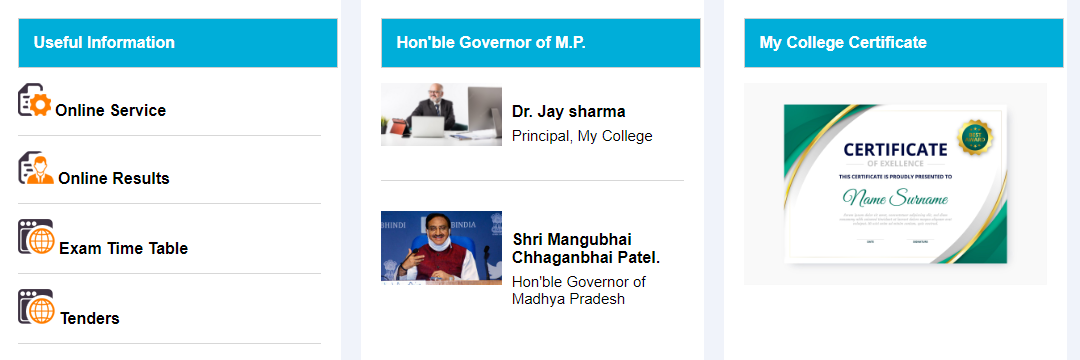
6) Now, we will design Information section.
In our information section, we are having information, hon'ble member and certificate. For Creating information we have ul tag and for certificate we are using img tag.
Please copy and paste the below code to design information section
Information section HTML code. Copy this code and paste in index.html file
index.html
<!---------- Information HTML Starts --------->
<>
<>
<>
<>
<>
<> Useful Information<>
<>
<>
<><> <>Online Service<><>
<><> <>Online Results<><>
<><> <>Exam Time Table<><>
<><> <>Tenders<><>
<>
<>
<>
<>
<>
<>
<> Hon'ble Governor of M.P.<>
<>
<>
<>
<>
<>
<>
<>Dr. Jay sharma<>
<>Principal, My College<>
<>
<>
<>
<>
<>
<>
<>Shri Mangubhai Chhaganbhai Patel.<>
<>Hon'ble Governor of Madhya Pradesh<>
<>
<>
<>
<>
<>
<>
<> My College Certificate<>
<>
<>
<>
<>
<>
<>
<!---------- Information HTML Ends --------->
Information section CSS code. Copy the code and paste in style.css
style.css
/********** Information Starts **********/
.useful-info-ul{
     list-style:none;
}
 .useful-info-ul a{
     text-decoration:none;
     color:black;
     font-weight:bold;
}
 .useful-info-ul li{
     margin-bottom:15px;
     border-bottom: 1px solid #d7d7d7;
     padding-bottom: 15px;
}
 .principal-image{
     text-align:center
}
 .principal-image img{
     height:230px;
}
 .principal-para{
     font-weight:bold;
}
/********** Information Ends **********/
Output Of Information Section
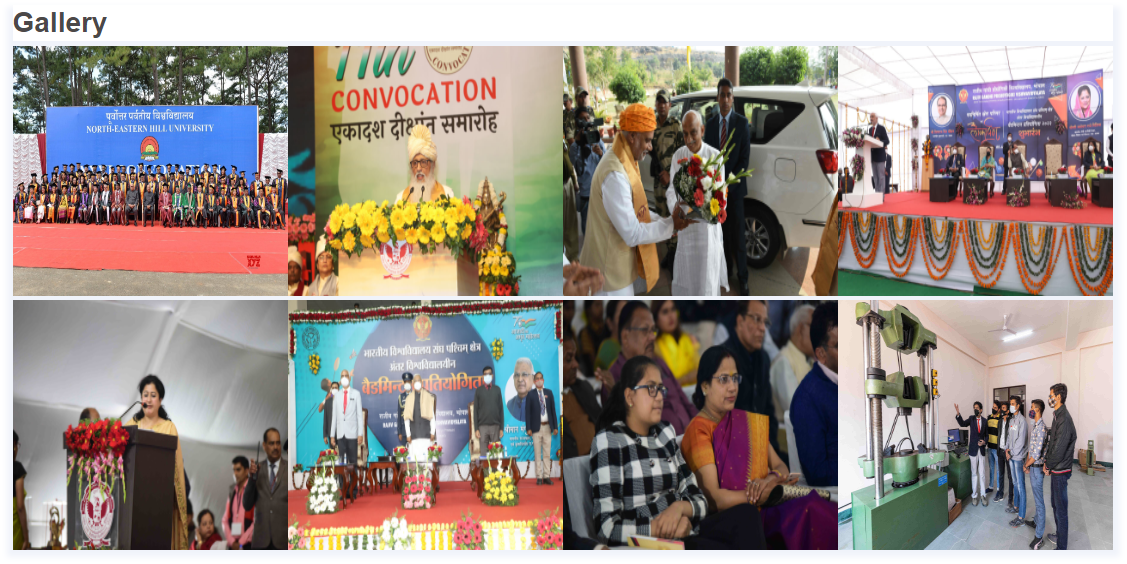
7) Now, we will design Gallery section.
In our Gallery section, we are having multiple images at a particular width. For Creating images we have img tag.
Please copy and paste the below code to design Gallery section
Gallery section HTML code. Copy this code and paste in index.html file
index.html
<!---------- Gallery HTML Starts --------->
<>
<>
<>Gallery <>
<><><>
<><><>
<><><>
<><><>
<><><>
<><><>
<><><>
<><><>
<>
<>
<!---------- Gallery HTML Ends --------->
Gallery section CSS code. Copy the code and paste in style.css
style.css
/********** Gallery Starts **********/
.gallery-img{
     height:250px;
     width:100%;
}
 .governor-section{
}
 .governor-img{
     width:100%;
}
 .governor-name{
     font-size: 16px;
     color: black;
     font-weight: bold;
     padding-left: 10px;
     margin-top: 20px;
}
 .governor-designation{
     font-size: 15px;
     color: black;
     padding-left: 10px;
     margin-top: 6px;
}
 .gove-sec-style{
     margin-bottom: 30px;
     border-bottom: 1px solid #d7d7d7;
     padding-bottom: 30px;
}
 .gallery-head-style{
     font-size: 28px;
     color: #4b4848;
     margin-bottom: 5px;
     border: 1px solid #cfcfcf;
     padding-bottom: 10px;
     padding-top: 15px;
     padding-left: 15px;
     background: #00aed9;
     background: white;
     border: none;
     padding: 2px 0px;
}
/********** Gallery Ends **********/
Output Of Gallery Section
8) Now, we will design Recruiter List section.
In our Recruiter List section, we are having top company images that are from right to left. For Creating images we have img tag and for movement we are using marquee tag.
Please copy and paste the below code to design Recruiter List section
Recruiter List section HTML code. Copy this code and paste in index.html file
index.html
<!---------- Recruiter List HTML Starts --------->
<>
<>
<>Top Recruiters Company<>
<>
<>
<>
<>
<>
<>
<>
<>
<>
<>
<>
<>
<>
<>
<>
<>
<>
<>
<>
<>
<>
<!---------- Recruiter List HTML Ends --------->
Recruiter List section CSS code. Copy the code and paste in style.css
style.css
/********** Recruiter List Starts **********/
.recruiter-head-style{
     font-size: 28px;
     color: #4b4848;
     margin-bottom: 5px;
}
 .recruiter-marquee{
     height: 100px;
}
 .recruiter-marquee img{
     height:80px;
     width:140px;
}
/********** Recruiter List Ends **********/
Output Of Recruiter List

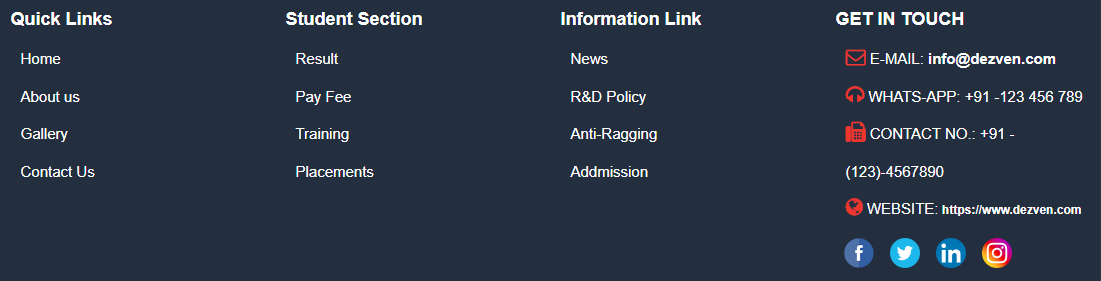
9) Now, we will design Footer section.
In our Footer section, we are having Quick Links, Student Section and social media. For Creating Quick Links we have ul tag and for social media we have icons.
Please copy and paste the below code to design Footer section
Footer section HTML code. Copy this code and paste in index.html file
index.html
<!---------- Footer HTML Starts --------->
<>
<>
<>
<>Quick Links<>
<>
<><>Home<><>
<><>About us<><>
<><>Gallery<><>
<><>Contact Us<><>
<>
<>
<>
<>Student Section<>
<>
<><>Result<><>
<><>Pay Fee<><>
<><>Training<><>
<><>Placements<><>
<>
<>
<>
<>Information Link<>
<>
<><>News<><>
<><>R&D Policy<><>
<><>Anti-Ragging<><>
<><>Admission<><>
<>
<>
<>
<>GET IN TOUCH<>
<>
<><><> E-MAIL:<> info@dezven.com<><>
<><><> WHATS-APP: +91 -123 456 789<>
<><><> CONTACT NO.: +91 -(123)-4567890<>
<><><> WEBSITE:<> https://www.dezven.com<><>
<>
<>
<><><><><>
<><><><><>
<><><><><>
<><><><><>
<>
<>
<>
<>
<!---------- Footer HTML Ends --------->
Footer section CSS code. Copy the code and paste in style.css
style.css
/********** Footer Starts **********/
.footer {
     background: #232F3E;
     padding: 50px 0px;
}
 .quicklink-menu {
     list-style:none;
     padding-left: 10px;
}
 .quicklink-menu li a {
     color: #fff;
     line-height: 2.5;
     font-size: 15px;
     text-decoration:none;
}
 .social-media {
     list-style:none;
     margin-top:10px;
}
 .social-media li a img {
     width:30px;
}
 .social-media li {
     float:left;
     padding:0px 8px;
}
 .quicklink-heading {
     font-size:18px;
     font-weight:bold;
     color:#fff;
     margin-bottom:10px;
}
 .get-in-touch {
     list-style:none;
     padding-left: 10px;
}
 .get-in-touch li i {
     color: #ed372c;
     font-size: 20px;
}
 .get-in-touch li {
     color: #fff;
     line-height: 2.5;
     font-size: 15px;
     text-decoration:none;
}
 .footer-e-mail {
     font-size:15px;
     font-weight:bold;
     color:#fff;
     text-decoration:none;
}
 .footer-website {
     font-size:12px;
     font-weight:bold;
     color:#fff;
     text-decoration:none;
}
/********** Footer Ends **********/
Output Of Footer Section
10) Now, we will design Footer Copyright section.
In our copyright information section, we are having copyright information. For Creating copyright information we have p tag it stands for paragraph.
Please copy and paste the below code to design Footer section
Footer Copyright section HTML code. Copy this code and paste in index.html file
index.html
<!---------- Footer Copyright HTML Starts --------->
<>
<>Copyright @ 2023, dezven.com. All Rights Reserved<>
<>
<>
<>
<!---------- Footer Copyright HTML Ends --------->
Footer Copyright section CSS code. Copy the code and paste in style.css
style.css
/********** Footer Copyright Starts **********/
.footer2-bacbor {
     background: #232F3E;
     padding:10px 0px;
     border-top: 1px solid #898989;
}
 .footer2-content {
     font-size:14px;
     color:#fff;
     text-align:center;
}
/********** Footer Copyright Ends **********/
Output Of Footer Copyright Section

how to create college website using HTML and CSS
How To Create School Website Using HTML And CSS
How To Create A College Website Using HTML AND CSS With Source Code
How To Design School / College Website Using HTML, CSS with source code
How to design simple college website using html and css
How To Design School / College Website Using HTML And CSS
Design College Website using HTML CSS
fantastic source code
Amazing work
Keep posting such kind of information on your site.
good enough to compete with other
Looks super clean, I learned some neat new tricks from this. Thank you for sharing all of this for free!
Clean, Simple, and looks good, thank you
thank u so much this is very useful